
Understanding Vapor Barrier Installation
What is a Vapor Barrier?
A vapor barrier is a material designed to prevent moisture from passing through walls, floors, and ceilings, effectively isolating the air within a building’s interior from the humid conditions of the surrounding environment. It acts as a protective shield that minimizes the risk of condensation, mold growth, and deterioration of building materials. Vapor barriers are particularly essential in crawl spaces, basements, and other areas where moisture can accumulate and lead to structural problems.
Importance of Vapor Barrier Installation
The installation of a vapor barrier is crucial for maintaining a healthy and stable living environment. Moisture intrusion can lead to severe consequences, including structural damage, mold growth, and compromised air quality. By effectively managing humidity levels, homeowners can protect their investments and enjoy longer-lasting structural integrity. Proper Vapor Barrier Installation can also improve energy efficiency, as it helps regulate indoor temperatures by reducing the workload on heating and cooling systems.
Common Materials Used in Installation
Several materials can be used for vapor barriers, each with unique properties and applications. The most common include polyethylene sheets, fiberglass, and spray-on vapor retardants. Polyethylene sheets are popular due to their low cost, durability, and ease of installation, typically available in various thicknesses (6-mil to 20-mil). Fiberglass, while less common, can function effectively in conjunction with other insulation products. Spray-on vapor retardants provide a flexible and seamless solution, often used in complex spaces where sheets may not be practical.
Preparing for Vapor Barrier Installation
Assessing Your Crawl Space
Before beginning the installation of a vapor barrier, it’s important to assess your crawl space. This includes checking for signs of moisture intrusion, structural damage, and critters that may inhabit the space. Look for standing water, dampness in the soil, or evidence of mold on wood beams. Identifying and addressing any moisture sources or structural weaknesses beforehand ensures a solid foundation for the vapor barrier and enhances the effectiveness of your moisture control strategy.
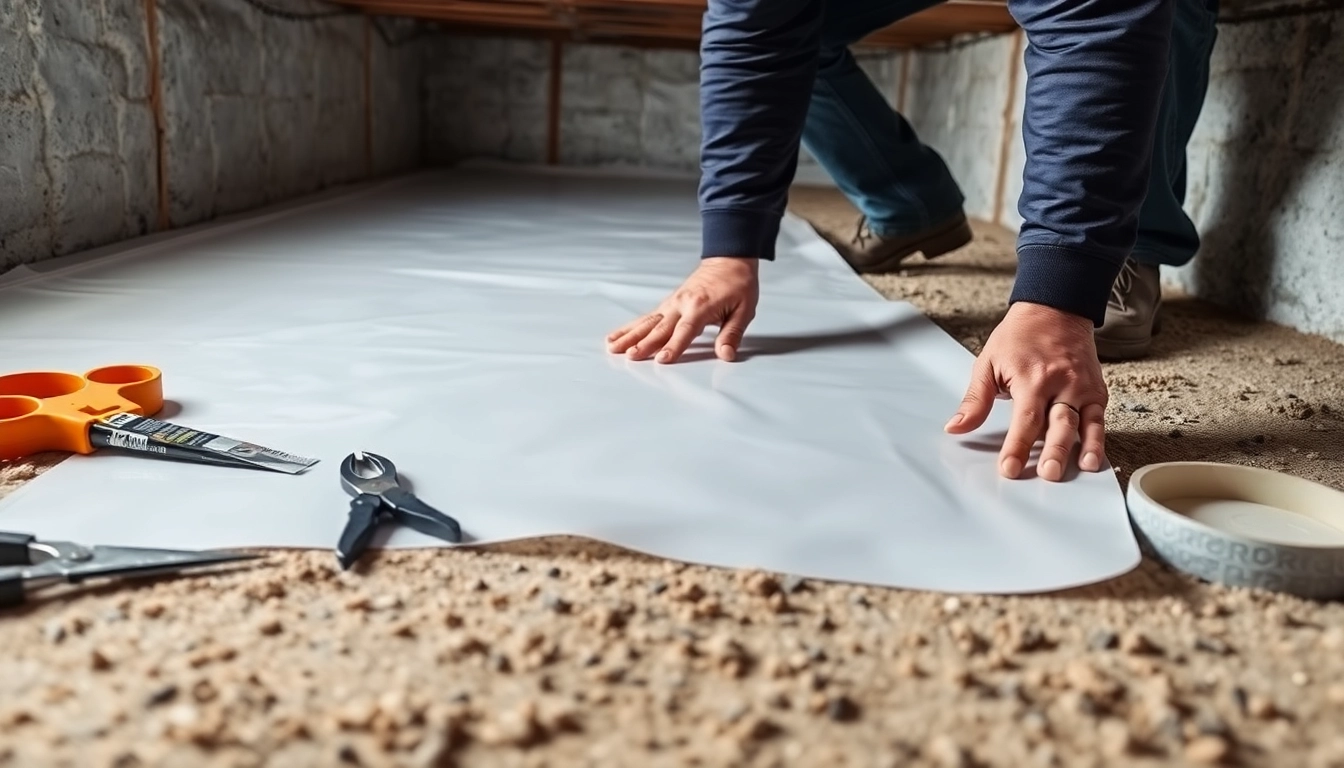
Essential Tools Needed
Having the right tools is essential for a successful vapor barrier installation. Key tools include a utility knife or scissors for cutting the barrier material, measuring tape for precision, a stapler or adhesive for securing the barrier, and heavy-duty gloves to protect your hands. You may also want a respirator for protection against dust, especially in confined spaces, and a moisture meter to check humidity levels before and after installation.
Safety Precautions
Safety should be a priority during the installation process. Always wear appropriate personal protective equipment, such as gloves, goggles, and masks, particularly in sticky or dusty environments. Ensure adequate ventilation in your crawl space to mitigate risks from inhaling fumes or dust. It’s wise to familiarize yourself with proper lifting techniques when maneuvering materials, and be cautious of uneven surfaces or hidden hazards in tight spaces.
Step-by-Step Guide to Vapor Barrier Installation
Cleaning the Crawl Space
Before laying down the vapor barrier, it’s crucial to clean the crawl space thoroughly. Remove all debris, including old insulation, wood, and any organic material that can retain moisture. Check for and repair any leaks in plumbing or irrigation systems. A clean space allows for better adhesion of the vapor barrier and prevents future moisture retention.
Measuring and Cutting the Barrier
Once the area is clean, the next step involves measuring the dimensions of the crawl space accurately. Create a drawing to help visualize the fitting, and use the measurements to cut the vapor barrier material accordingly. Make sure to leave some extra material to overlap seams properly; a general rule is to have at least 12 inches of overlapping at the edges.
Securing the Vapor Barrier
With the vapor barrier cut to size, begin securing it to the ground and walls of the crawl space. Use a combination of construction adhesive, staples, or heavy-duty tape to hold it in place. Ensure that it lies flat with no folds or wrinkles, as these can trap moisture. Pay extra attention to seams, ensuring they are well overlapped and securely fastened to prevent moisture from seeping through.
Common Challenges in Vapor Barrier Installation
Dealing with Humidity
One of the most significant challenges during installation is managing existing humidity in the crawl space. If humidity levels are high, it’s essential to reduce them first, using dehumidifiers or ventilation strategies. A thorough assessment of the environment and taking necessary precautions ensures the effectiveness of the vapor barrier once installed.
Addressing Damage Before Installation
Any existing damage in the crawl space must be addressed prior to installation. This includes repairing wooden beams or joists, sealing cracks, and ensuring the area does not harbor pests. Ignoring these issues can lead to compromised integrity of the vapor barrier, which may not adhere properly and will fail in its moisture deterrent purpose.
Finding Professional Help
For some homeowners, DIY installation may not be feasible due to complexity or safety concerns. In such cases, seeking professional assistance can be a wise choice. Professionals have the expertise, tools, and experience to manage installation effectively and can provide warranties for their work, ensuring peace of mind in moisture management.
Maintaining Your Vapor Barrier
Regular Inspections
Once installed, regular inspections of the vapor barrier are essential. Check periodically for signs of tears, punctures, or shifting materials. Look for moisture accumulation in the crawl space and address any signs of changes in humidity levels. Regular maintenance ensures that the barrier continues to function effectively, safeguarding against moisture-related issues.
Repairing Damages Over Time
Even the best-installed vapor barriers can suffer from wear and tear over time. Should you discover any damage during inspections, it is important to repair it promptly. Use appropriate materials to patch any holes or tears, ensuring a seamless fit. Maintaining the integrity of the vapor barrier can prolong its effectiveness and protect your home from moisture intrusion.
Understanding When to Replace
Recognizing when to replace your vapor barrier is crucial for ongoing moisture control. Signs that indicate replacement may be necessary include persistent mold or mildew odors, visible tears or damage, or evidence of condensation buildup. Regular monitoring and early detection of these issues can help you decide when it’s time for a new installation, ensuring your home remains protected.
FAQs
What are the benefits of installing a vapor barrier?
Installing a vapor barrier helps prevent moisture-related issues like mold and structural damage, improves energy efficiency, and enhances indoor air quality.
How often should I inspect my vapor barrier?
It’s advisable to inspect your vapor barrier at least once a year or after heavy rainfall to ensure it’s intact and performing effectively.
Can I install a vapor barrier myself?
Yes, homeowners can install vapor barriers, but proper research and understanding of the process are crucial for effective installation and safety.
What thickness of vapor barrier should I use?
A 6-mil polyethylene plastic is the minimum thickness recommended, but thicker options (10-20 mil) may yield better durability and effectiveness.
When should I consider professional help for vapor barrier installation?
If dealing with extensive damage, complex spaces, or if unsure about the installation process, it’s wise to hire professionals for optimal results.